Next on my project list is a cartoonish-styled vignette for February. The two art dolls are Lola and Zoey. They have a special event planned to raise funds for their common cause: HEARTS AFIRE DRAGON RESCUE and ADOPTION: Be My Valentine, Kisses for a Good Cause.
A few years ago when Zoey adopted Lola, the two became best friends and decided that all dragons should be as lucky as Lola to find a forever home. Together they came up with the idea of Kisses for a Good Cause fund-raiser. They named their dragon rescue and adoption organization, Hearts Afire.
Tip: Click a pic to enlarge it.


Follow my journey of making Hearts Afire in the photos and narrative below.
Lola is first up on the maker's list: Tip, place your cursor over a picture and click once, or twice to enlarge the pic.


 Below is how I improvised to find a way to support Lola's head and neck in the oven. That is an 8 ounce jelly jar padded with batting and paper towel supporting her. This worked like a charm!

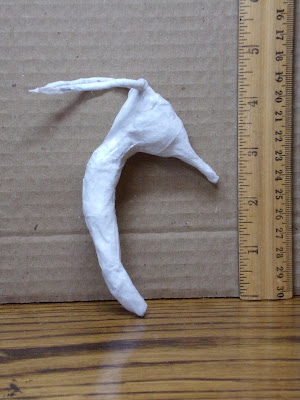
 Because of her height, I had to fashion, sculpt and bake Lola in two parts. First, her head and neck; then her torso, with her legs and wings. Below is Lola, finished and waiting for Zoey!
I created Lola with a 50/50 combination of Premo clay in 'Gray Granite' and 'Periwinkle Blue'. Her eyes are French flat-back glass.
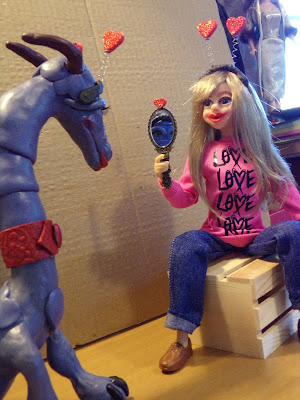
Lola was rescued by Zoey. She is a rare 'hearts afire' dragon, known as the gentle giants of dragons. Zoey estimates that Lola is about 'teen' age, (high-school age) and she will not reach her full size until her late-20s. Hearts afire dragons are easily identified by their heart-shaped 'scales' and a full heart-shaped mantle on the chest. Most often they are of a blue-hue. For Lola and Zoey's fundraising event, both 'girls' are dolled up in matching red lipstick!


Next is Zoey, Lola's forever pal and owner/guardian, a young woman with a kind heart for all creatures, especially dragons.
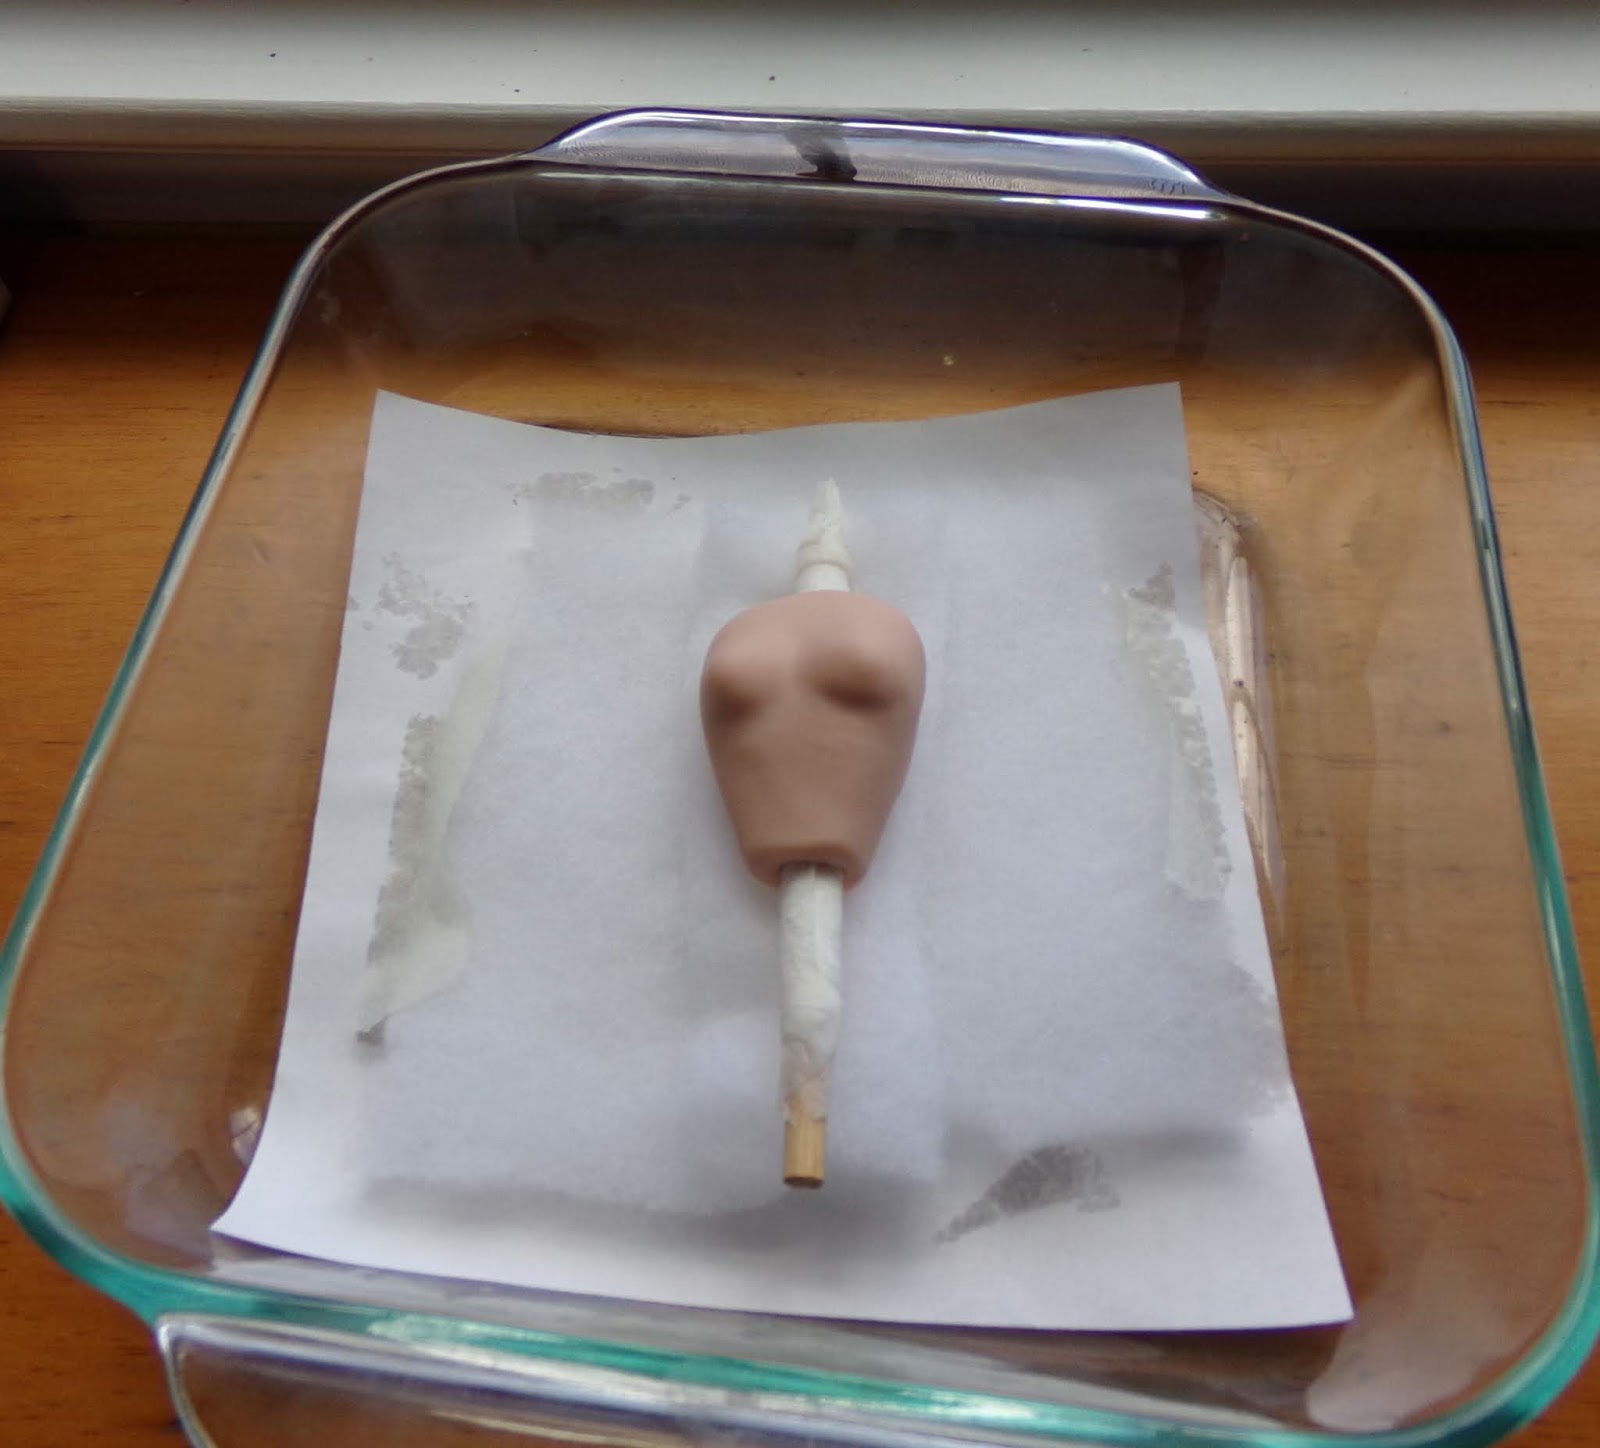
All heads, regardless of type of being, have a core inside. I utilize scrap clay for cores, choosing a clay color that is neutral or close to what will be the skin color. I let a core cool overnight before proceeding to sculpt the head and face. Below I have pictured three head cores, one of them will be Zoey. Which one? Take a guess. The largest is on the left and has a bit of a neck stem, it is on an armature wire for baking. The next largest is on the right and it has a neck 'blob' (a small flattened ball), it is pierced for baking on an armature wire. The last, and smallest, is setting, not on a wire. It is the roundest of the cores, nearly globe shaped. It has a hole in the base, but no neck stem or blob.
The color of the clay and variation is not a deciding factor, after-all, this is scrap clay and will be entirely covered with Zoey's skin-tone clay. All three cores came out of oven-curing perfectly smooth and without cracks... all three have potential.

HOW I BAKE A HEAD! The photos below depict the resourcefulness needed to improvise on baking methods. I'm sure I am not alone in the art-doll creators' world in saying that there are myriad virtues in saving scraps of cardboard to build baking platforms. Zoey is colored with artists pastels (chalk) before baking. The hues are brighter than what they will end up b/c some of the color will be buffed out of her skin after she is cured and dry. . . when I finish detailing her face with a combination of pastels and acrylic paint. The armature wire in her neck is temporary, it is a 'space-keeper' for a hole in her neck/head to which she will be attached to her torso armature, in the same method that Yorick and Ambrose were created.


I've begun to make a armature/body for Zoey. The photo below shows the scale I use as a guideline. And it shows Zoey's finished face. PS. while bald can be beautiful. . . Zoey will have a blond wig full head of hair when she is completed. I do not glue a doll's wig on her head until very close to finishing, there's just too much upkeep involved when I put the wig on early in the process.

Next I sculpted a bust for her, see pics below.


Her bust is hollow to allow and armature to run through it, and connect her head/neck, arms torso and legs.


I baked the bust with a small wood dowel covered in paper towel paper to keep the hollow area form collapsing inward during the firing.


Zoey has some brown slip-on shoes to wear, so her feet are 'shoe-formed.'


Baking them is tricky, I had to create a special stand to hold them upright while firing.


A few years ago when Zoey adopted Lola, the two became best friends and decided that all dragons should be as lucky as Lola to find a forever home. Together they came up with the idea of Kisses for a Good Cause fund-raiser. They named their dragon rescue and adoption organization, Hearts Afire.
Tip: Click a pic to enlarge it.


Follow my journey of making Hearts Afire in the photos and narrative below.
Lola is first up on the maker's list: Tip, place your cursor over a picture and click once, or twice to enlarge the pic.


I created Lola with a 50/50 combination of Premo clay in 'Gray Granite' and 'Periwinkle Blue'. Her eyes are French flat-back glass.
Lola was rescued by Zoey. She is a rare 'hearts afire' dragon, known as the gentle giants of dragons. Zoey estimates that Lola is about 'teen' age, (high-school age) and she will not reach her full size until her late-20s. Hearts afire dragons are easily identified by their heart-shaped 'scales' and a full heart-shaped mantle on the chest. Most often they are of a blue-hue. For Lola and Zoey's fundraising event, both 'girls' are dolled up in matching red lipstick!


Next is Zoey, Lola's forever pal and owner/guardian, a young woman with a kind heart for all creatures, especially dragons.
All heads, regardless of type of being, have a core inside. I utilize scrap clay for cores, choosing a clay color that is neutral or close to what will be the skin color. I let a core cool overnight before proceeding to sculpt the head and face. Below I have pictured three head cores, one of them will be Zoey. Which one? Take a guess. The largest is on the left and has a bit of a neck stem, it is on an armature wire for baking. The next largest is on the right and it has a neck 'blob' (a small flattened ball), it is pierced for baking on an armature wire. The last, and smallest, is setting, not on a wire. It is the roundest of the cores, nearly globe shaped. It has a hole in the base, but no neck stem or blob.
The color of the clay and variation is not a deciding factor, after-all, this is scrap clay and will be entirely covered with Zoey's skin-tone clay. All three cores came out of oven-curing perfectly smooth and without cracks... all three have potential.

HOW I BAKE A HEAD! The photos below depict the resourcefulness needed to improvise on baking methods. I'm sure I am not alone in the art-doll creators' world in saying that there are myriad virtues in saving scraps of cardboard to build baking platforms. Zoey is colored with artists pastels (chalk) before baking. The hues are brighter than what they will end up b/c some of the color will be buffed out of her skin after she is cured and dry. . . when I finish detailing her face with a combination of pastels and acrylic paint. The armature wire in her neck is temporary, it is a 'space-keeper' for a hole in her neck/head to which she will be attached to her torso armature, in the same method that Yorick and Ambrose were created.


Next I sculpted a bust for her, see pics below.


Her bust is hollow to allow and armature to run through it, and connect her head/neck, arms torso and legs.


I baked the bust with a small wood dowel covered in paper towel paper to keep the hollow area form collapsing inward during the firing.
Once the bust is entirely cooled, I wait at least a day, I create her armature and connect the upper body to the lower body. In the area of the hollow of her back, I have glued the armature in place with Lock-tite gel glue. Next up is shoe-form feet/legs and hand arms.


I sculpted legs onto the feet, overlapping in the area of her ankles, smoothing out the clay so that it blends seamlessly and then baked the feet, again, with the legs, as seen in the picture below.
Baking them is tricky, I had to create a special stand to hold them upright while firing.


I do not show the sculpting of, or the finished arms/hands, before baking them. They were too fragile to try to move once I had the hands exactly the way I wanted them, so... from my work table to the oven and now onto her body, with her legs/feet and neck head.


I will finish wrapping all the wire with medical paper tape and then add batting to the hollow of her back and wrap batting on her legs, arms, torso and neck. Finally, after all that, Zoey will be ready to dress, and have her wig glued in place.
Looking at the photos below, Lola and Zoey are just about ready for their Hearts Afire Valentine's Day Fund-Raiser. Some fine tuning is needed and I still have to build their mixed-media set.


