My journey is over! I finished Yorick , my entry into the Zombie craze. Below are pics of the final vignette. Yorick has a sound track, it is the song "If I Only Had a Brain." I added an 18-note wind-up music box to the back of his platform, you can see the music box key in pics of the back of this display. And along the sides of his platform I have signage that show the lyrics to 'his song' : If I Only Had a Brain.
What I made, hmmm. . . it is easier to say what I did not make: The crate platform for the display, the grass and shrub covering, Yorick's shoes, top-coat and pants, his hair, the music box. What I made: Yorick, the tombstone and the tree stump, and the brain, I sculpted from clay. I made the deli sack and deli foil wrapping, and the lyric signage. Also, I made Yorick's under-sweater and his socks. Below the pics of this finsished vignette are some photos of how I began this journey and process of creating Yorick and some of his props. FYI, Yorick is 12 inches tall when standing, he is self-supporting and can be posed.
Tip: place your cursor over a photo and click to enlarge the photo. Then use the back arrow on your browser to return to the previous page.


How I made Yorick : Below is my photo/text documentation of making Yorick and his display. While I do not show every little step (doing so would be too time-consuming and an interruption to the process), the photos and brief explanations give an overall idea about creating/sculpting a posable art doll.
"YORICK" alas, I knew him well... Yorick is my entry into the ZOMBIE craze. By the way, I made Yorick with the same technique that I made Ambrose.
You'll notice that Yorick has quite a bit of neck on him, well so does Ambrose. The long neck is needed to fit the head/neck down into the torso. So, stay tuned, check back to see his progress!
Tip: place your cursor over a photo and click to enlarge the photo. Then use the back arrow on your browser to return to the previous page.
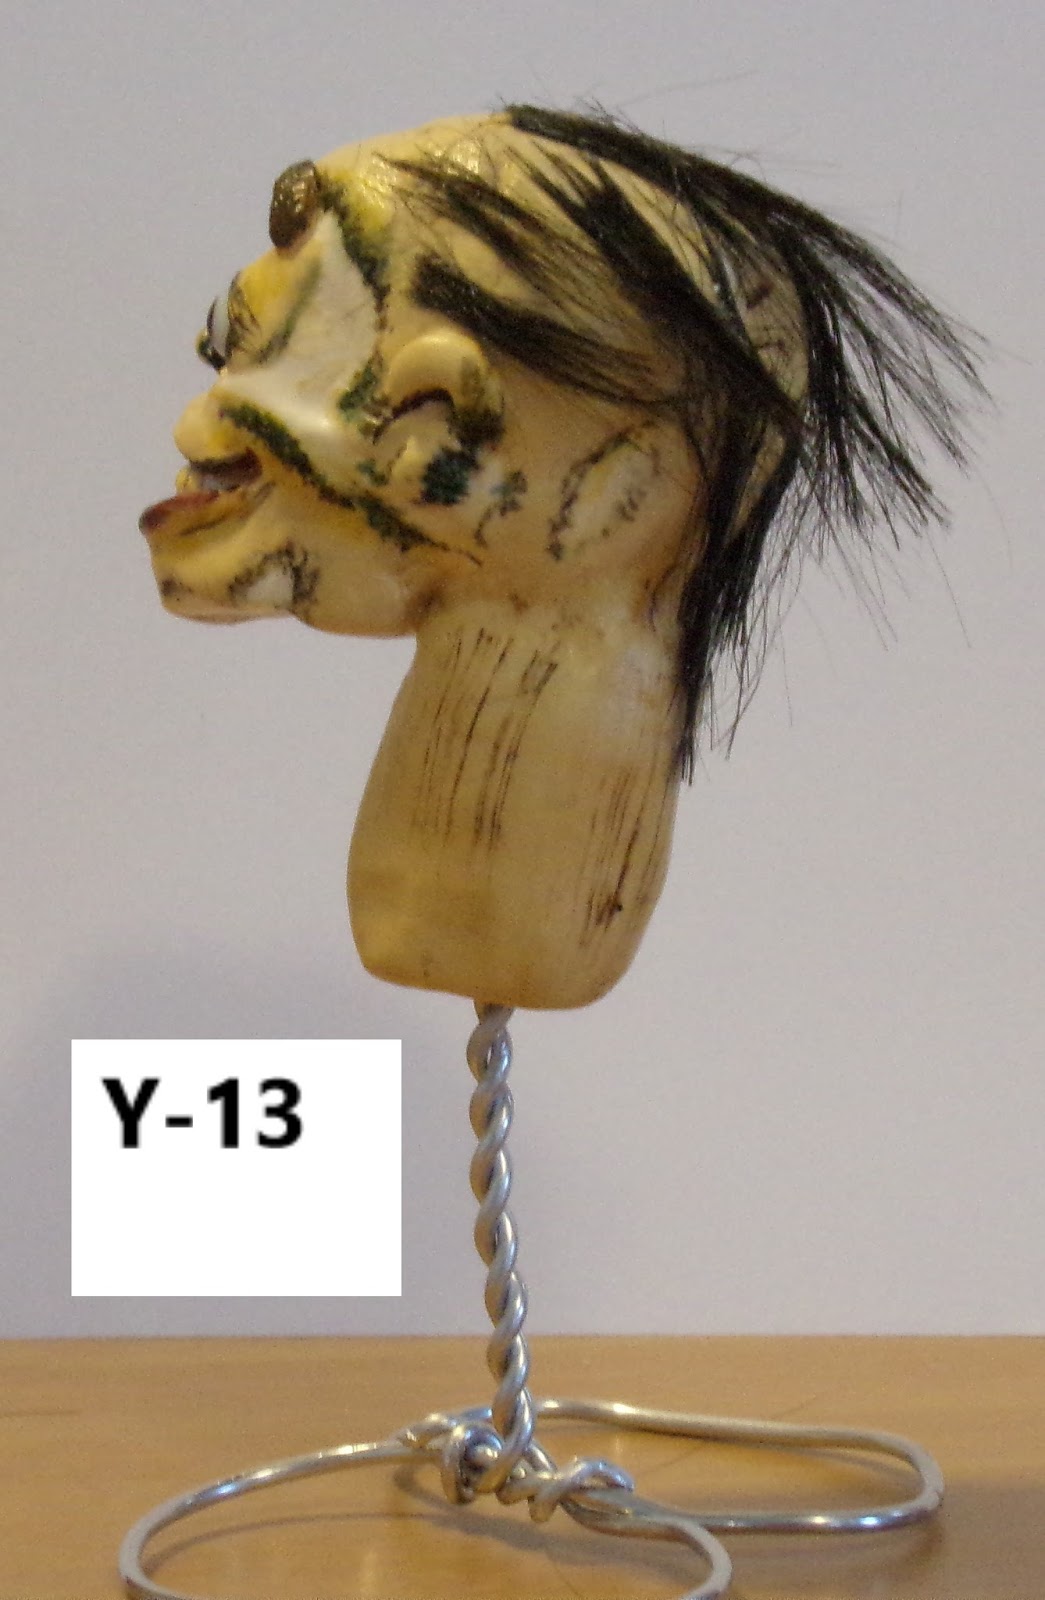
In making this skull, I first combined Premo white clay with Premo perle white clay. Though it may not show in the photos, the skull has a patina, a slight sheen on the surface. What you see here is the basic skull before I deepend the eye sockets to accommodate the globe shaped eye balls, had I used the flat back style of eyes, I would have left the eye sockets alone at this point in the sculpt, but because I wanted to position Yorick's eyes in a downward cast, I needed to use the full globe eyeballs. I also sculpted his jaw line higher into more of a grin, and I made his cheek bones a bit more prominent. Then I baked the skull and after it was cured I added the skin layer.


 For his skin I used Premo ecru. After fleshing out his head and face, refining/detailing his teeth, and adding a neck, I baked him again, then after curing, I added details with artist acrylic paint.

 Finally, no more baking and curing his head and face, Now I add detail with paint and hair.


Yorick's hair (well, what hair that remains after he turned into a zombie) is real hair! My cat 'Darby' contributed wisps of hair from the tip of his beautiful tail. Really, one cannot even detect that any hair is missing, take a peek at Darby's photo, below.

Next up is designing and making Yorick's inside/skeleton: his wire armature.
The photos below show a typical armature, this is Yorick's. On my friendly scarecrow, "Ambrose" I made his armature like this one. Notice that at first the bare aluminum wires are not taped. Then I taped the torso with medical paper tape. This allows for easier handling and his less damaging to my hands and fingers. As Yorick's progress continues, I will tape the remaining sections of his armature as needed. The armature's arms, neck and legs are much longer than what will be needed. Those parts are cut to accommodate the head/neck, arms and legs/feet when I add them to the body.


Hmm, now about this brain... Gosh, I wonder what a zombie, such as Yorick, will do with a fresh brain??? Stay tuned!


Yorick's hands are next. I begin with creating a wire armature for each hand by using cotton-covered wire. Clay does not stick very well to metal, so when using wire for armatures, the wire must be coated/covered with a material the clay will adhere to. I purchase this unique wire from the MoreZMore supply house. After creating the armatures I begin a 4-step process of creating the hands and forearms. First is covering the palm of each hand with a thin layer of clay, and curing it. This sets the palm and allows for handling/sculpting of the thumb and fingers. Next, I flesh out the palm and add a thumb, then cure again. Then I add the remaining fingers and flesh out the completed hand, and cure, again. Finally I add the forearms and, cure again. Then after cooling, I detail with paint and after the paint is dry I seal the hand/arm with a varathane matte finish. It is a multi-day process.


I'm ready to add Yorick's limbs to his torso and fill-out his body, then I'll get him dressed. I glued Yorick's head, arms and legs onto the wire frame, (there's a pic of it a few photos up from here) then added the batting strips. Below is his wire armature body to which I have wrapped poly-cotton batting, that I have cut into strips. The batting strips are glued in place as I wrap them around (and around and around. . .) I call this 'the mummy' phase!.

The rest of the pics show Yorick dressed. His under-sweater and socks match, I made those. His top-coat, trousers and shoes are purchased, once again, as with Ambrose, I am much obliged to Ebay dealers who specialize in vintage G.I. Joe clothing. Judging by these pics, Yorick must be getting hungry! I'd best get back to work creating his 'scene' so he'll have a place to sit down and enjoy his meal!.


